DIY Preschool Alphabet Book and Activity
Published:
September 11, 2018

Contributor:
Carrie
Disclosure: This post may contain affiliate links, meaning if you decide to make a purchase via my links, I may earn a commission at no additional cost to you. See my disclosure for more info.
Let’s face it, preschoolers are much more kinesthetic (i.e. hands on) in their approach to learning. When my very active son was learning his letters, I needed a way to keep him engaged and learning that would not stifle his interest or force him to be still for long periods of time.
We created an alphabet notebook, and you can too!
Materials needed to make and alphabet book
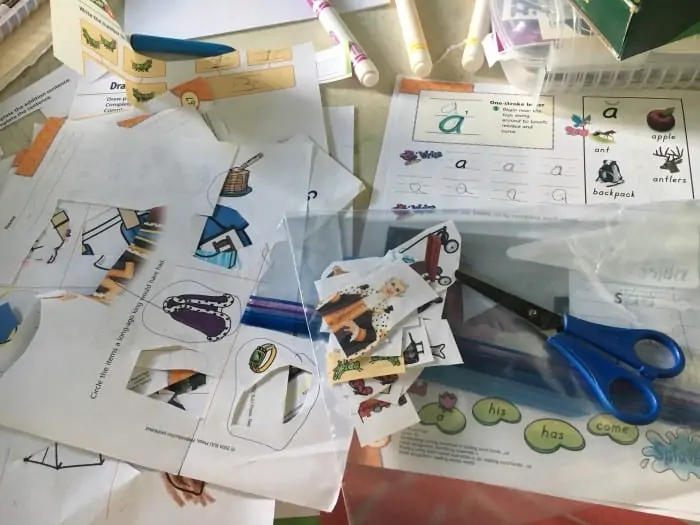
Here are the things you will need. No need to get fancy. Preschoolers are usually not impressed by that. Functional is key for this activity.
- A notebook of any kind with 55+ pages (8.5″ x 11″ is a great size because it gives them lots of room. lines or unlined doesn’t matter.)
- A marker or pen
- Scissors
- Glue
- Sandwich bag
- Old magazines, workbooks or newspapers
- Stickers – optional
- Page tabs – optional (we actually used masking tape in the example pictured)
Creating the alphabet book
We opened our notebook to the first two page spread and wrote a big letter “A” and a small letter “a” at the top. Then we moved to the next two page spread and did the same with B, etc. Later we wished we’d had an even bigger notebook to leave 4 full pages for each letter, so you might consider that.
If you’d like to add the page tabs with the letter printed on each, this helps the student find the letter pages later and helps them grasp the sequential nature of the alphabet, as well.
Then, we cut out all kinds of pictures of things (one thing per picture if possible) from completed workbook and activity pages and added them to our plastic sandwich page for safe keeping.

The Alphabet Book Activities
Letter studies
For this activity, we chose a letter to study and went through our bag of pre-cut pictures/ or sticker pack to find all of the things starting with this letter. Then, we glued them on the corresponding letter page of the Alphabet Book. If your preschooler is advanced, you can also write out the word next to the picture, so the student can see the letters and spell the whole word, identifying each letter.
Random Alphabet Fun
For this activity, we we pulled random pictures from the sandwich bag or random stickers from the sticker pack, decided which letter it started with, found that letter page, and stuck it on the page. This is the easier activity to do when you are short on time.
If you’re using proper name stickers like Disney’s Elsa and Anna, you can let your student choose to put them on the E and A pages for their names, or on the G page for girl.

The fun thing is that you can always find more pictures/stickers to add to your notebook, and when you finish the semester or school year, the student has a whole alphabet book that he made, and is his own picture dictionary. This activity might also work well when combined with the Letter of the Week activities found here.
Carrie
Carrie Fernandez is the owner of Daily Skill Building. She has been homeschooling for over 18 years, has two girls and works side by side at home with her awesome husband. She has been saved by grace, fails daily, but continues to strive toward the prize of the high calling of being a daughter of the Most High God.